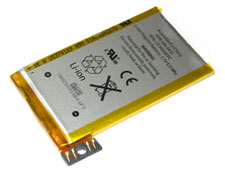
You May Need to Replace Your iPhone 3GS if…
- … your battery is running out faster than normal.
- … your phone is charging quicker than normal.
- … your iPhone frequently crashes.
A Word Of Warning
Apple did not make replacing the battery a simple task. It will take a little time to complete and please remember things can go wrong and you can damage your iPhone. If you are not confident in undertaking this task of iPhone battery replacement please get a professional to undertake the procedure. Just give us a call on 0116 2866447 and we can help.
Not sure what iPhone you have? Check our iPhone comparison guide.
If you are feeling confident read on.
What You Will Need:
Replacing Your iPhone 3GS Battery
Step 1
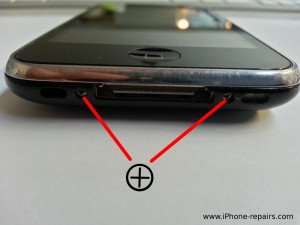
Undo the 2 screws a the bottom of the iPhone 3GS using the small Philips (cross head) screw driver.
Step 2

Place the screen removal sucker on the lower part of the screen near the home button and slowly lift the screen open. Hinge the screen upwards from the home button, with the hinge point being the upper edge of the screen near the power button, use your other hand to limit how far it opens.
Step 3
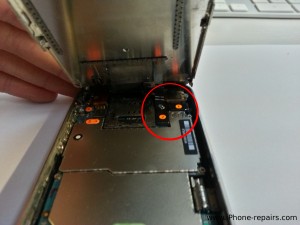
Once the iPhone screen is opened you will see 3 ribbons connecting the screen to the logic board. They are labeled 1, 2 and 3. Using a small flat headed screwdriver gently pop the ribbon connectors marked 1 and 2 from the logic board.
Step 4
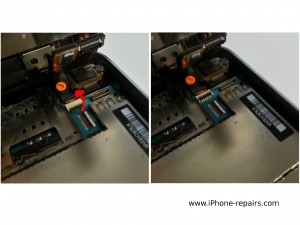
Ribbon cable 3 is a little different it has a little locking bar you have gently flick to the upright position, once in the upright open position the sensor ribbon cable 3 can then just be slid out.
Step 5
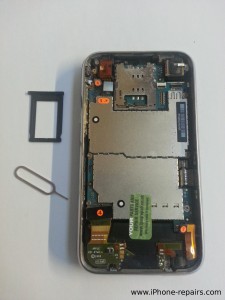
Next remove the SIM tray by using an Apple SIM card ejector or a paper clip. Then pop off the connectors in order. These are numbered 4 5 6 7.
Step 6
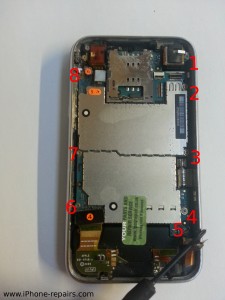
Now you will need to remove the screws as labeled in the picture. Be careful as the screw holding the camera marked number 1 on the above image has a small metal clip that needs to be removed as well.
The screw marked number 5 is underneath the warranty sticker. This will be damaged during this procedure and the Apple warranty will be voided. This iPhone 3GS is over 12 months old so is no longer covered under the manufacturer’s warranty.
Step 7
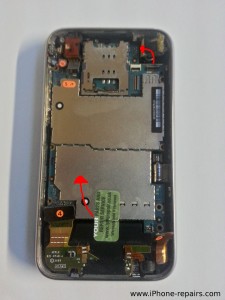
Gently pop out the camera by levering under the bottom edge of the camera that is attached to the rear of the logic board. Then gently leaver the logic board out from the bottom.
Step 8
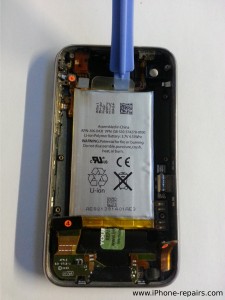
Using the plastic spudger tool and the plastic tab, pry the iPhone battery from the back case. This can be difficult as the adhesive backing on the iPhone battery can be quite strong.
Step 9
Now place the new iPhone battery into the rear case. The new iPhone battery has a sticker on the back. The protective layer just need to be peeled off. Assembly of the iPhone is just a matter of repeating the above steps in reverse order.
We hope this is a help to all of you iPhone battery replacement DIYers out there.
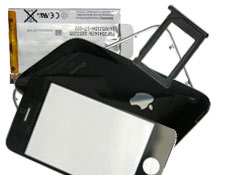 Your iPhone 3GS might be showing some signs of aging. There are probably a good assortment of scratches on the screen. The case probably has various marks and dinks in it. The SIM tray is probably chipped and scuffed and the bezel has probably seen better days. The battery is probably lasting shorter and shorter. Your iPhone 3GS is tired.